It’s FINALLY here. Are you ready for it? I don’t think you are. Are you sure?! Well, okay, if you say so, then I guess I can tell you.
For those of your that don’t know me, I am just a teeny tiny bit obsessed with all things Halloween. And obsessed may be a slight understatement. Last year I was the ever-so-fierce Maleficent and the year before I popped off the comic books pages as a Lichtenstein inspired character.

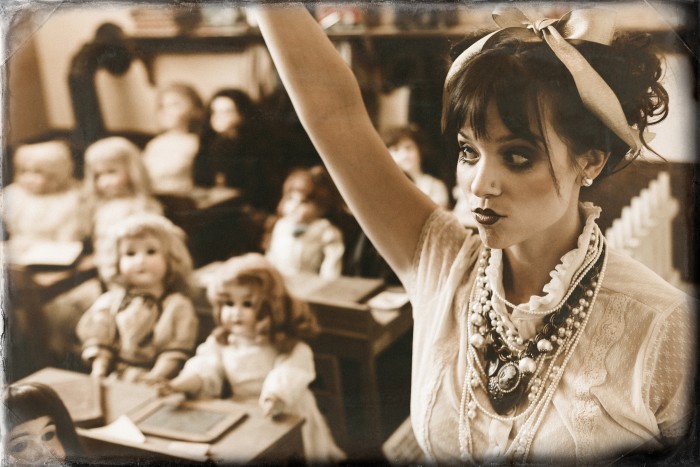
This year’s costume is, drum roll and quick Usher dance please… an Antique Porcelain Doll. And yes, it is meant to thoroughly creep you out as much as possible. Sorry ’bout it.
Thanks to the spot-on makeup skills of SN Makeup Artist Stephanie Neiheisel and the photography mastermind, Michelle Herrick of Michelle Herrick Photography, I was transformed into one of those dolls you felt like was always staring at you, no matter where you would go.
Now for the FUN part! Stephanie was kind enough to share the step-by-step makeup tutorial & Michelle captured the transformation so I could share it with the idieh blogosphere so YOU can become a doll, too! Please join me!
Antique Porcelain Doll Makeup Tutorial
 PREP
PREP
First, prep your skin with appropriate moisturizers and primers then apply a good eye primer to your eye for a lasting hold and so you get the true pigment of your shadow. Try MAC’s ‘Painterly’ Paint Pot!
 EYES
EYES
You’ll want to start creating the shadow on your eyes. Most dolls have a soft yet hauntingly defined eye with killer lashes. If you go the beauty/victorian route you can choose warm tones like we did here! Start with a highlighter on the eyelid and 2-3 warm/deep tones on the outer-lid, outer-crease, and the bottom outer lash line. Then use a darker tone to “smoke out” the lash line.
 LASHES
The most important feature to this look is the top and bottom lashes. I took an Ardell Demi Wispie lash and cut it into threes so I could separate it on the eye to give it a more dramatic/avantgarde look. I placed one lash on the inner eye, one in the center above the pupil of the eye, then one on the outer eye lid. Then use tweezers and good lash glue to apply false
individual lashes to the bottom. You can make it as dramatic as you’d like! Make sure to cover the top lashes with a final application of black liner to blend the band into the look.
 SKIN
SKIN
Dolls have perfect porcelain skin. I used a highlighter shade on the t-zones, a pale matte sheer foundation on the rest of the face, set the skin with a sheer translucent powder, and applied a generous and angular application of a warm blush to the cheeks.
 LIPS
LIPS
The final and second most important part of the “Doll” look is the lips! You can block out the entire lip color and shape by applying a product like MAC’s ‘Painterly’ Paint Pot all over the lips. This is an eye primer that will also help hold the lip color on and keep it from budging. I started with a dark brown eyeliner from MAC called ‘Dip Down’ to reshape Heidi’s lips into a cute heart shape. Ignore the outer corners of the lip and over accentuate the bow of the lip as well as the center of the bottom of the lip. Blend the liner into the lip and then start to fill in the center with your color.
TA-DA! Now get creepy and scare some people!

What’s your go-to Halloween costume and makeup? Make sure to share on Facebook and Instagram and tag #IdiehHalloween!
Check back in a few days to see the BIG reveal of our annual Halloween card. I’m not gonna lie. It’s SOOOOOO good.

THANKS A TON to the AMAZING team that made this all possible!
Makeup: SN Makeup Artist
Photography: Michelle Herrick Photography